
Categories
Tags
-
#Waste Oil to Diesel
#Land Rig Installation
#Used Engine Oil Recycling
#Transformer Oil Dehydration
#Sodium Fusidate
#Lube Oil Refining
#Dabigatran
#Fire-Resistant Oil Filtration Machines
#Active Pharmaceutical Ingredients
#Dry Air Generator
#Dry Air Generators
#Transformer Oil Filtration Machine
#Base Oil Extraction
#Drum Scales
#Used Oil Re-Refining
#Vacuum Transformer Oil Purification
#Waste Oil into Diesel
#Apalutamide API
#Transformer oil purifier
#Waste Oil Distillation
#Dot Peen Engraving
#Scribe Marking Machines
#Laser Cleaning Machine
#Mill Finish Aluminium Disc
#Scribe Marking Machine
#Integrated Scribe Marking Machine
#Aluminum trim coil
#Aluminium Circles
#Diesel Desulfurization Machines
#Aluminum Circles
#Transformer Oil Regeneration Machines
#Aluminium Sheets
#Base Oil Distillation Machine
#Cummins Power Command generator controller
#Waste Oil to Diesel Distillation Plant
#Cummins Injector Cups
#Solvent Extraction Plants
#Cummins Injector Plunger Link
#Diesel Desulfurization Machine
#Fiber Optic AOMs
#Waste Oil Recycling
#Marble Grain Aluminum Coil
#Lube Oil Blending
#Lube Oil Refinery Plant
#Waste Engine Oil Refining Plant
Archives
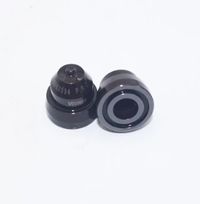
How to Properly Install Cummins Injector Cups Without Leaks
-
Installing injector cups in a Cummins engine is a critical task that requires precision to prevent leaks and ensure optimal engine performance. A faulty installation can lead to coolant leaks, fuel contamination, or even engine damage. Follow these steps to install Cummins injector cups correctly and avoid costly mistakes.
Step 1: Clean the Injector Bore Thoroughly
Before installing new cups, the injector bores must be free of debris, old sealant, and corrosion. Use a bore brush and a cleaning solvent to scrub the bores. Compressed air can help remove any remaining particles. A clean surface ensures a proper seal.
Step 2: Check the New Injector Cups for Defects
Inspect the new cups for cracks, scratches, or manufacturing flaws. Even minor imperfections can cause leaks. Ensure the cups are the correct part number for your Cummins engine model (e.g., ISB, ISX, or QSB).
Step 3: Apply the Right Sealant
Using the correct sealant is crucial. Cummins recommends Loctite 620 or an equivalent high-temperature retaining compound. Apply a thin, even layer inside the injector bore—not on the cup itself—to prevent excess sealant from entering the fuel passages.
Step 4: Install the Cups with Proper Tools
Use a Cummins-approved installation tool to press the cups in evenly. Avoid hammering them in, as this can deform the cup. The cup should sit flush with the cylinder head surface. Some engines require the cup to be slightly recessed—consult the service manual for exact specifications.
Step 5: Allow Proper Cure Time
Let the sealant cure as per the manufacturer’s instructions (usually 24 hours). Rushing this step can lead to seal failure. Avoid introducing coolant or fuel until the sealant has fully set.
Step 6: Pressure Test for Leaks
After installation, perform a coolant pressure test (around 15-20 psi) to check for leaks. If bubbles appear, the cup may not be seated correctly and will need replacement.
Final Tips
Always replace O-rings and seals when installing new cups.
Follow torque specs for injector hold-down bolts to avoid distortion.
If unsure, consult a Cummins-certified technician.
Proper installation ensures a leak-free seal and extends engine life. Taking shortcuts can lead to costly repairs—do it right the first time!
Need help with your Cummins engine? Leave a comment or contact a certified diesel mechanic for expert advice.